I read a lot of articles on putting A/C in a fiberglass camper. My dad will appreciate this post.
It is/was reaching the upper 90s here and Maggie and I were grumpy and sick and tired of feeling like the steamy filling in a fiberglass Hot Pocket. We kept checking to see if hell had exploded. Maggie glared at me to do something. But what to do?
I didn’t have the extra roof reinforcements for a roof A/C unit, nor did I have the funds for something like that.
I’d read posts about the window unit/closet install method, (may still be a future option when I can) but I have no cutting tools with me.
I needed a removable (for traveling) window solution. None of the articles I read had quite the right thing for my setup. I always seem to have unusual or odd setups and of course no one else that post articles about what they did seems to fit my situation, so there I am off in lonely oddball rig land.
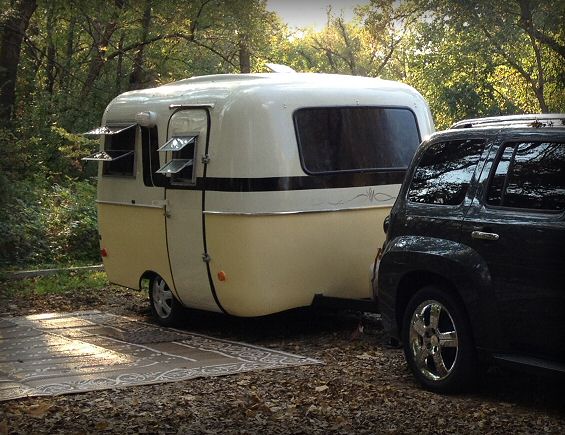
My Scamp is a 1978 model and has jalousie side windows. It has fiberglass walls so you can’t hammer nails or drive screws into them. Neither the front or rear big windows opened in any way. Ugh!
But I was determined to have A/C, come hell or high water (and at this rate it was looking like hell was in the lead). To have my A/C and use it too, I was going to need to support a 40+ lb window air unit; the smallest I could find that would fit the window. (Mr. Scamp is a 13′ so it wouldn’t take a huge unit to cool it down.)
First, I removed the screen and unscrewed and removed the bottom jalousie pane of one of the Scamp’s side windows.
I had about a 21.5″ width opening, and it’s about 15-16″ in height with the remaining window pane all the way open.
I went to find the smallest window unit I could. Home Depot had the smallest unit, a 5,000 BTU LG model which only needed a 21″ width opening. Bingo! We had a winner.
I then wandered around thinking like mad, which was difficult because even my brain was sweating. I wondered now how on earth I was going to hold this thing in the window when it hit me – a custom bastardized cantilevered shelf. I had a drill with me so I could make one, I just couldn’t cut anything so the wood would need to either be pre-sized or I’d have to have Home Depot cut it.
I happened to find a piece of Poplar (scrap from a sold-by-the-foot section) that was 12″ x about 16″. I grabbed 2 twisted-style support brackets, a package of small L brackets and some shims. The lumber worker just gave me the Poplar piece at no charge! The A/C was $139 and the brackets and shims came to around $17.
Here’s the shelf I brainstormed and made (the bottom side). I sat up at 11:30 pm screwing this together. The next day was also supposed to be 97 degrees and it was necessary that Maggie and I not melt into puddles of goo. The A/C plan needed to be done now:
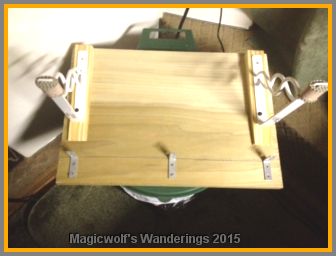
It took 3 shims on each side, screwed down with the twisted brackets, to compensate for the slight slope in the way things were angled (see pic below). I wrapped the ends of the brackets in non-skid shelf liner I had laying around so they wouldn’t mark up the fiberglass.
The 3-L brackets hook over the inside aluminum lip of the fairly-sturdy jalousie frame and keep everything from going backwards out the window. The cushioned twisted brackets support on the outside.
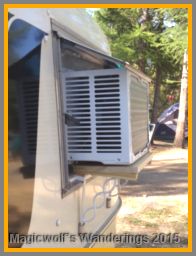
It sets into the window opening and the weight of the A/C keeps everything in place.
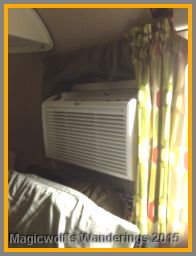
The A/C sits nicely on the shelf and just clears the top (opened) jalousie pane. I used some of the A/C box wrapped in most excellent beige duct tape, and packing styrofoam to block in any gaps.
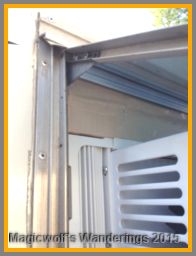
It’s a little bit of a pain because the A/C must be removed and the jalousie pane must be re-installed when I move but…it’s 97 degrees outside here at the time of composing this post (!) but…it worked! I could have wept with joy. Maggie and I are inside, where it’s a comfortable 79 degrees instead.

Are you installing A/C? Well, it’s about time!

 About King George Washington
 George's Greatest Hits
 Magnificent Maggie
 The Very Best of Magnum
 Meet My Daughters
 Hhrbie and The Scamp
 That Little Scamp
 Customer Service
 Home Buying
 Magic Diet Plan
 Maximo
 Tech Support From Hell
 Too Much Information
![Mosquitos. Zeeee-ing….[Smack]! Mosquitos.](http://www.magicwolf.com/wanderings/wp-content/uploads/mosquito_compressed.jpg) Zeeee-ing….[Smack]!
Zeeee-ing….[Smack]!
Leave a Reply